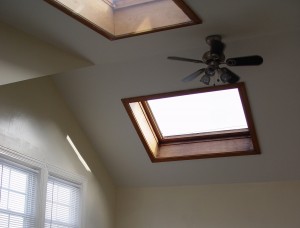
DIY: How to Successfully Install Skylights in Roofing San Antonio
Skylights in roofing San Antonio present many concrete benefits not only to the aesthetic appeal of the house but also to its occupants. With more daylight coming into the structure through the skylights, less energy is needed to illuminate the rooms because natural light does the job well.
Installing your own skylights in a San Antonio roofing is not difficult. While it requires basic knowledge of construction, it is doable. Below is a step-by-step procedure on how to install skylights. The procedure may vary for different roof designs and materials but the general method is similar.
1. Cutting the opening
Once you identified the exact location where to put your skylight, drive a deck screw through the roof on every corner of the opening. Go to the roof and use a chalk line between the screws as guide. Use a circular saw to cut through the roof as outlined by the chalk line.
2. Flashing the Sill
Stick a strip of membrane across the edge of the opening. Cut the membrane and fold the top inch of the strip cover on the sill.
3. Placing the Skylight
Have a helper assist you in lifting the skylight through the opening to the roof. Once you have a secured hold of the skylight, carefully lower it to the roof by resting its bottom edge against the sill. Drive nails through the holes in the skylight flange and into the roof.
4. Sealing the Skylight
Wrap the bottom part of the skylight flange with a strip of membrane. Do the same for the top part of the skylight frame. Next do the same for the side flanges.
5. Flashing the Bottom
Cover the bottom membrane with roofing shingles, using nails to put them in place. A seal on the nails will be created by the membranes. Put a U-shaped sill flashing on the shingles and secure it at the bottom part of the skylight. Do not forget to put shingles on the exposed sides of the skylight.
6. Flashing the Sides
Cover the sill flashing with an L-shaped step flashing. Drive nails on the top and a little below that. Place shingles on top of the flashing, add another layer of flashing on top. Do this on both sides of the skylight.
7. Counter-flashing the Sides
Use counter-flashing to cover the vertical legs of the step flashing. Counter-flashing is important to keep wind-driven snow and rain from penetrating the skylight.
8. Saddle Flashing
Remove the shingles above the skylight and slit an opening on the underlying membrane. Slip the saddle flashing through the slit and fit it on the top of the skylight. Drive nails through the flashing to keep it in place. Restore the shingles on top.
